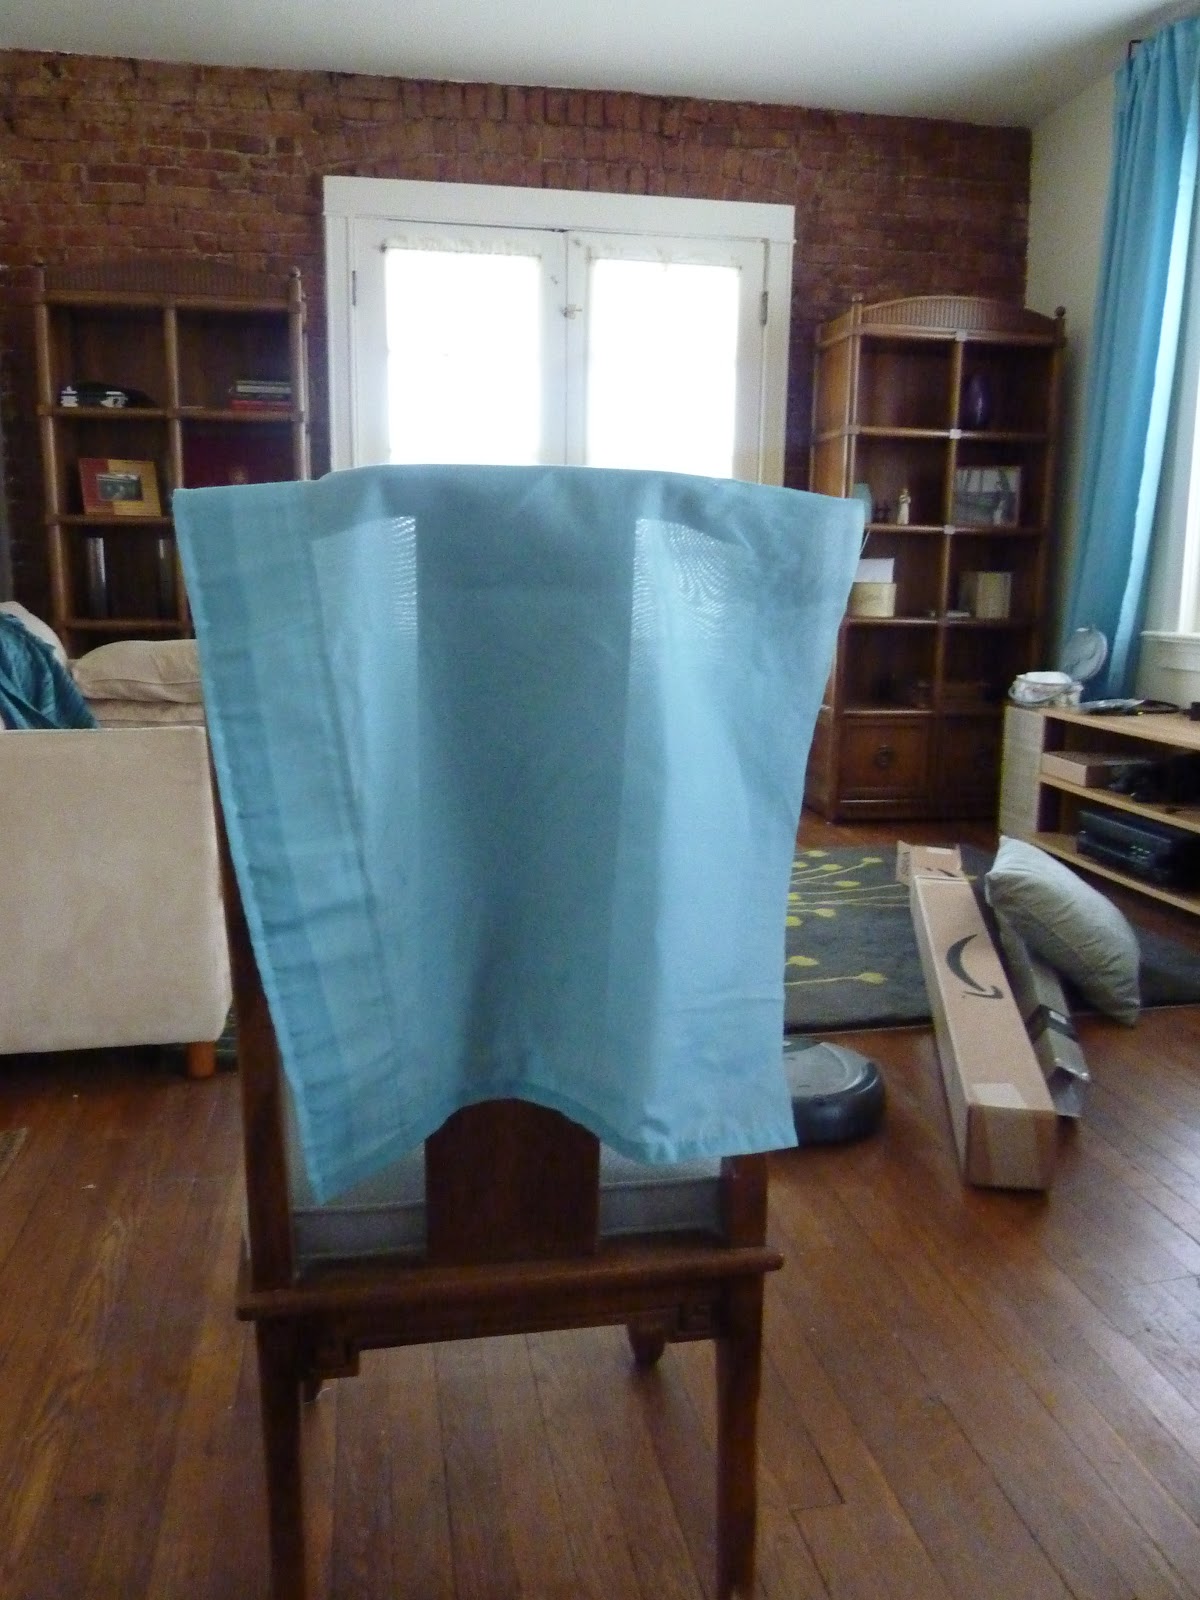
Yeah, that didn't quite work the way that I hoped, oh well. :)
It's New Year's Eve, the last day of the year, and I have seen so many friends and loved ones post recaps on Facebook that I thought perhaps I would take a stab at it myself. After all, 2012 was kind of a big deal for N and I - and as usual we have not done our Christmas cards. I swear, we intend to complete them every year. This year we even went as far as starting to design a card (N really wants a photo card and won't even considering using any of the cards that I have in storage) only to realize that we really didn't have any good pictures of the two of us together! Ruh roh.
Anyway, what to say about 2012? It was a year of accomplishing goals, that is for sure! I finally graduated law school after four grueling years, and N managed not to kill me. It was a wonderful feeling, if a bit anticlimactic. I went on my first "girls" vacation as an adult to celebrate my thirtieth birthday, and no one went to jail!! N and I slugged our way through the bar, and again, no one died. I even passed!
N was offered a new opportunity to expand his horizons at work, which was a major accomplishment and (I personally believe) a sign of how valued he is there. Finally. :) And me? Well, I started my first "real law" job. I'd say real job, but let's be honest, I've had a string of "real" jobs that brought me to this point, so let's just hold on here. I proved myself to be the diva of flexibility and packed my life to transition to Kansas City, without N, and so far we're thriving in our unconventional arrangement. After all, we hit the five year marriage mark in September, the thirteen year together anniversary in October, and no one is trading up for a new model yet.
We've celebrated many new additions as our friends have expanded their families, and I could not be happier to be an honorary auntie all over again. Even though it means that I spent significant portions of the year drinking alone, as sitting next to a pregnant lady while you chug wine just makes you look like you have a problem. I have watched my nephews blossom into charming little boys, watched my sister overcome amazing odds through sheer grit, and realized just how awesome so many of our friends are. It's a damn accomplished group, that is for sure.
Not all of 2012 has been perfect. I miss my husband, cats, family, and friends. We've suffered personal loss, and grieved with others near and far. But I'm hoping that what we pull out of that loss is the continued reminder that we need to grab and cherish what we have. Which means we definitely will have pictures worth sharing in 2013. Next year, I want to be able to show you what happened, so that eighty years from now when I am no longer here our friends and family will also be able to remember.
So raise your glass. Have a blessed 2013. May your challenges be few and your blessings great. May you fail - because it means that you tried. Hug your loved ones, and remind them why they are loved. I will see you on the flip side!.
Monday, December 31, 2012
Friday, December 7, 2012
The Bedroom Closet
The apartment is old, like from an era when people really did not have closets. The largest closet, and the one where I keep my clothing, is in the dining room. I actually think that it was built in when the apartment was switched from radiant heat to forced air. There is a "closet" next to it that houses the furnace, and the closet continues behind the wall.
The wall in the bedroom is TINY. I mean frighteningly small: less than twenty-four inches wide at the back, thirty-six inches wide at the front, and only twenty inches deep. The previous tenant used it to store some of her craft materials. I decided to use it to store my shoes and purses. In the condo, even though we have sufficient closet space, I never had an effective storage area for my shoes. This time, I wanted something that would encourage me to keep them organized.
After looking at what seemed like hundreds of shoe racks on Amazon, I ordered this shelf.
 All of the traditional shoe racks seemed to have huge design flaws (like crashing to the floor) or were too small. This was the correct width, and looked like it would be a good height. But when I first set it up, it seemed too small. It didn't go high enough in the closet, and I wondered if I needed more shelves. I had enough space for my shoes (once I put my summer sandals into storage) but there was not enough space to put my purses and other accessories. But then I had an epiphany, and this was the result.

I realized that I could hang my purses off of the rod, and bought a box to keep small hand held purses and my umbrella. The top shelf (which you can't see here) has my suitcases, my nice purses that need to be stored flat in their bags, and some random totes. My scarves are also on the rod. It's a great accessory closet, even if it would make an AWFUL real closet!
:)
The wall in the bedroom is TINY. I mean frighteningly small: less than twenty-four inches wide at the back, thirty-six inches wide at the front, and only twenty inches deep. The previous tenant used it to store some of her craft materials. I decided to use it to store my shoes and purses. In the condo, even though we have sufficient closet space, I never had an effective storage area for my shoes. This time, I wanted something that would encourage me to keep them organized.
After looking at what seemed like hundreds of shoe racks on Amazon, I ordered this shelf.
I realized that I could hang my purses off of the rod, and bought a box to keep small hand held purses and my umbrella. The top shelf (which you can't see here) has my suitcases, my nice purses that need to be stored flat in their bags, and some random totes. My scarves are also on the rod. It's a great accessory closet, even if it would make an AWFUL real closet!
:)
Tuesday, December 4, 2012
Living Room "In Progress"
More pictures, aren't you excited! This is how the apartment looks right now. Well, almost right now. It is definitely a good feeling to be getting to the point where I feel that I can live in and enjoy my home, and where I would not be embarrassed if someone were to come by to visit!
The living room was one of the reasons that I rented this apartment. Nick and I really loved the French doors and the exposed brick. Now, however, it looks less like the second hand shop that we first saw, and more like me. The furniture is a mixture of family pieces, craigslist finds, and hand me downs. I am liking the vibe in the space, although there are a few things that I would like to change at some point.


The couch is the original pullout from our condo. The pillow on the left was the one that I recovered with the green patterned fabric, but I have not had a chance to take new pictures yet (I mean really, my house hasn't been clean enough!. The poster above the couch may move on shortly. I like it (it's an old nineties Aaron Chang print) but it doesn't seem to fit and I think I need something with some color.

Projects Remaining:
The living room was one of the reasons that I rented this apartment. Nick and I really loved the French doors and the exposed brick. Now, however, it looks less like the second hand shop that we first saw, and more like me. The furniture is a mixture of family pieces, craigslist finds, and hand me downs. I am liking the vibe in the space, although there are a few things that I would like to change at some point.

This is the leather chair that I purchased on craigslist. The pillow, lamp, and stool are from Ikea, although the stool has since moved on. I think that I'm just going to skip a table because the space is a little tight. I also have since placed some additional art on the wall with the arch. Going forward, I would really like to replace the lamp with an arched reading lamp, which would add an interesting architectural element and also take up less visual space on the wall.

These bookshelves came from Nick's grandparents. The rug is one of my favorite pieces. It was a splurge purchase from CB2 for the condo that moved to Kansas City with me to hide from the cats. The coffee table came from Nick's aunt. I was not initially certain that it would be something that I wanted to keep long term in the apartment, but when it arrived it just worked.

The couch is the original pullout from our condo. The pillow on the left was the one that I recovered with the green patterned fabric, but I have not had a chance to take new pictures yet (I mean really, my house hasn't been clean enough!. The poster above the couch may move on shortly. I like it (it's an old nineties Aaron Chang print) but it doesn't seem to fit and I think I need something with some color.

I had to hang the curtains from the ceiling because of the crazy plaster walls. I finally got a television that has taken its place of honor on the media stand. The speakers are from Nick's uncle, and although they may seem old, they have a fantastic sound and I love the look.
Projects Remaining:
Art on the arch wallTweak art on the arch wall (I'm considering embroidering it!) .- Replace art above the sofa
- Build a table for behind the sofa
Recover the pillow for the sofa- New lamp for behind the chair
- Buy pouf ottoman
- Paper the back of the book
I think that over all it's going really well, but I'm still excited to see how it may start to develop in the future!
Sunday, December 2, 2012
Sewing a Pillow Cover
A few weeks back, as things continued to get closer to being "done" in the living room, I decided to tackle the pillow cover that I have been meaning to put together for the other pillow on the couch. I first bought this fabric to make pillow covers for the condo, but never ended up making the pillow covers. So I brought the fabric with me, which was good because I have an old bedroom pillow that is the right size but wrong color for the couch.

The basic pillow pattern is one piece for the front, measuring the size of the pillow plus one inch added to the height and the width (assuming half inch seams). The back is two pieces, the width of which is that of the pillow plus an inch. Each back piece should also be half of the height plus three or four inches (assuming one inch for the seams, 3/4 of an inch to finish the seam, and fabric for overlap).

The first step is to finish the overlap seams. Iron a double quarter inch seam along the width of each piece, and finish it on your sewing machine. Then, lay the two back sides on top of the front (right sides facing in) and pin the edges.


Sew the outer edges of the form, moving around the outside. You can reinforce the start and end sections, but I just started and then moved around to the end. I do then do a few reverses, but I'm not sure that they are necessary. Trim the corners.


Once the pillow cover is finished, turn it inside out, and stuff it!


Voila! New pillow for the couch. On to the next project. I can't tell if I'm excited to finish these projects, or if I will ultimately be depressed when there is nothing left to do! I'm leaning towards excited, especially now that I have a television to waste my time.
:)

The basic pillow pattern is one piece for the front, measuring the size of the pillow plus one inch added to the height and the width (assuming half inch seams). The back is two pieces, the width of which is that of the pillow plus an inch. Each back piece should also be half of the height plus three or four inches (assuming one inch for the seams, 3/4 of an inch to finish the seam, and fabric for overlap).


Sew the outer edges of the form, moving around the outside. You can reinforce the start and end sections, but I just started and then moved around to the end. I do then do a few reverses, but I'm not sure that they are necessary. Trim the corners.


Once the pillow cover is finished, turn it inside out, and stuff it!


Voila! New pillow for the couch. On to the next project. I can't tell if I'm excited to finish these projects, or if I will ultimately be depressed when there is nothing left to do! I'm leaning towards excited, especially now that I have a television to waste my time.
:)
Friday, November 30, 2012
Coffee Staining Fabric
Not long after I finished my roman shades in the bedroom, I bought a new duvet cover. I had been eyeing this particulr duvet forever. I first saw it online. I loved the color and the pattern so much, but was not certain that I could make the purchase. Pottery Barn is expensive, and it was more than I would normally consider spending on on a duvet cover. So, I put it aside.
A few weeks after I moved to Kansas City, I was at the Pottery Barn and saw "my" duvet. It was part of the display bed, and it looked even better in person than it had online. It had all of the colors: plum, turquoise/teal, and browns. The finish, although a cotton sateen, was great and not too shiny. Strangely, I did not see any of the sets out for sale though. I forced myself to walk away. When I got home, I looked it up online again. It seemed that my duvet may have been discontinued. It was listed as being on sale, but the website only had the twin size (twin size is sold online only and is often the last to go). Sigh. I knew that I should have bought it.
Eventually, I ended up in the Plaza again, just walking through the stores for inspiration. As I walked into Pottery Barn, I decided to see if my duvet was still on display, knowing that it would be gone and I would be disappointed. But it was still there. So I asked an employee if they had it for sale. He confirmed that it was discontinued, and that they did not have any. So I asked if I could buy the display, as I assumed that it was a full queen. He looked shocked at first, but said it was absolutely an option and that it actually helped them because people continued to ask about the pattern and they did not have it. Sold.
In retrospect, I probably just should have bought it when I first saw it. Especially as the only place that now has the shams is eBay, and they are expensive! When I got home, I immediately put it on my comforter, and it was perfect. It was dark and thick enough to cover the pattern of the original comforter. Plus, it was beautiful, and so soft.

But then I looked at my new, recently created, so much work (relatively speaking) roman shades. And the blue of the fabric was too bright.

I love to layer colors, and I'm not one to make sure that all of the different tones are "matchy matchy." But these were both too close and not close enough. It was just enough off to make the room look like a three-year-old had designed it instead of complex and layered. What to do? My first thought was to return the duvet. So sad, but doable. But this was my linchpin piece that would pull the whole room together. Should I just start over on the shades instead, and pick a fabric that was a better match? Ugh. I put a lot of work into those shades!
I decided to keep the duvet. But before I trashed the shades, I decided to see if I could somehow "mute" the color. So I went to my handy DIY expert, Dr. Google, to research tea staining. It turns out that there are two methods for staining fabric, tea staining, and coffee staining. (This website has a good description of both and the effect that they give.) Lucky for me, coffee staining seemed to give more of the color effect that I was looking for, since I had coffee in the house and not tea!
Next question, how to stain the fabric? I really did not want to take the fabric down, despite the fact that most of the demonstrations required dipping the entire piece of fabric. Would putting the coffee into a spray bottle work? I decided to run a test.


The flash on the camera bleached out the pictures, so it is difficult to see the difference, but I decided that overall the experiment went well. The process itself was fairly easy. I released the blinds to their full length, and evenly sprayed the fabric until it was thoroughly saturated. In some places, this did cause the glue dots to loosen, but I reattached them without problem. I did have a paper towel that I used to blot the fabric and wipe up the excess coffee on the window sill. You can see in this picture that the coffee darkened the fabric just enough (the window on the far left has been stained, but the other two windows have not.

I'll come out and admit that I did not finish the fourth window in the bedroom when I did the others. This meant that I was able to stain that piece of fabric before I hung it. For anyone looking to replicate the process, it was much easier! I was able to dampen the fabric more, which helped to ensure an even finish. But either way, it worked!
The end result is that I get to keep my duvet, and my window shades. As a bonus, I have a new technique for adjusting fabric color.
:)
A few weeks after I moved to Kansas City, I was at the Pottery Barn and saw "my" duvet. It was part of the display bed, and it looked even better in person than it had online. It had all of the colors: plum, turquoise/teal, and browns. The finish, although a cotton sateen, was great and not too shiny. Strangely, I did not see any of the sets out for sale though. I forced myself to walk away. When I got home, I looked it up online again. It seemed that my duvet may have been discontinued. It was listed as being on sale, but the website only had the twin size (twin size is sold online only and is often the last to go). Sigh. I knew that I should have bought it.
Eventually, I ended up in the Plaza again, just walking through the stores for inspiration. As I walked into Pottery Barn, I decided to see if my duvet was still on display, knowing that it would be gone and I would be disappointed. But it was still there. So I asked an employee if they had it for sale. He confirmed that it was discontinued, and that they did not have any. So I asked if I could buy the display, as I assumed that it was a full queen. He looked shocked at first, but said it was absolutely an option and that it actually helped them because people continued to ask about the pattern and they did not have it. Sold.
In retrospect, I probably just should have bought it when I first saw it. Especially as the only place that now has the shams is eBay, and they are expensive! When I got home, I immediately put it on my comforter, and it was perfect. It was dark and thick enough to cover the pattern of the original comforter. Plus, it was beautiful, and so soft.

But then I looked at my new, recently created, so much work (relatively speaking) roman shades. And the blue of the fabric was too bright.

I love to layer colors, and I'm not one to make sure that all of the different tones are "matchy matchy." But these were both too close and not close enough. It was just enough off to make the room look like a three-year-old had designed it instead of complex and layered. What to do? My first thought was to return the duvet. So sad, but doable. But this was my linchpin piece that would pull the whole room together. Should I just start over on the shades instead, and pick a fabric that was a better match? Ugh. I put a lot of work into those shades!
I decided to keep the duvet. But before I trashed the shades, I decided to see if I could somehow "mute" the color. So I went to my handy DIY expert, Dr. Google, to research tea staining. It turns out that there are two methods for staining fabric, tea staining, and coffee staining. (This website has a good description of both and the effect that they give.) Lucky for me, coffee staining seemed to give more of the color effect that I was looking for, since I had coffee in the house and not tea!
Next question, how to stain the fabric? I really did not want to take the fabric down, despite the fact that most of the demonstrations required dipping the entire piece of fabric. Would putting the coffee into a spray bottle work? I decided to run a test.

The flash on the camera bleached out the pictures, so it is difficult to see the difference, but I decided that overall the experiment went well. The process itself was fairly easy. I released the blinds to their full length, and evenly sprayed the fabric until it was thoroughly saturated. In some places, this did cause the glue dots to loosen, but I reattached them without problem. I did have a paper towel that I used to blot the fabric and wipe up the excess coffee on the window sill. You can see in this picture that the coffee darkened the fabric just enough (the window on the far left has been stained, but the other two windows have not.

I'll come out and admit that I did not finish the fourth window in the bedroom when I did the others. This meant that I was able to stain that piece of fabric before I hung it. For anyone looking to replicate the process, it was much easier! I was able to dampen the fabric more, which helped to ensure an even finish. But either way, it worked!
The end result is that I get to keep my duvet, and my window shades. As a bonus, I have a new technique for adjusting fabric color.
:)
Tuesday, November 27, 2012
Bedroom Vanity
When I was moving to Kansas City, many of our family members kindly donated items for my new apartment. One of these donations was a small student desk from Nick's aunt. It was a nice desk, but the finish was an orange-ish eighties oak, and it was also a little worse for wear. I decided that it deserved an upgrade. The desk itself is a little on the small side - it isn't possible to store files or paper in it. But given the *tiny* size of the bathroom, I was desperately in need of somewhere to store makeup and jewelry. So, it became an integral part of my "vanity nook" in the bedroom.
I don't have a real before picture. Sorry. I do have a half-way before picture, with one coat of paint and the drawers. It gives somewhat of an idea of the desk!


When I previously used it on the walls, it came out much darker and moodier, but between the small scale of this desk, the brighter contrast of the cream walls, and the plaster of paris (which lightens the paint) it came out as a lavender. The texture of this paint seemed to be a little more difficult to work with than the green oops paint. I think that this is because it was a self-priming, self-leveling paint. So, note to self, when working with homemade chalk paint, there is no need to get fancy with the base!


I don't have a real before picture. Sorry. I do have a half-way before picture, with one coat of paint and the drawers. It gives somewhat of an idea of the desk!

As I mentioned, the finish was orangey, and the handles brassy. It is also a very light desk, so it does not have any of the extra details that a desk of a similar style might have.
I decided to use homemade chalk paint on this piece as well. Instead of buying new, I utilized some latex paint that was leftover from the last time that I painted our bedroom in Chicago. The color is Sherwin Williams Chinchilla. It is a taupey/brown/grey/purple color.


When I previously used it on the walls, it came out much darker and moodier, but between the small scale of this desk, the brighter contrast of the cream walls, and the plaster of paris (which lightens the paint) it came out as a lavender. The texture of this paint seemed to be a little more difficult to work with than the green oops paint. I think that this is because it was a self-priming, self-leveling paint. So, note to self, when working with homemade chalk paint, there is no need to get fancy with the base!


I used a paint brush (as opposed to a roller) for this project because I thought that the style of the piece lent itself to a more textured finish. I painted inside with this project, which overall worked well. I used some cardboard for drips, and I did not have to worry about the low temperatures affecting the curing. I did the first coat, and then waited a few days before the second. This was not because it needed that much time to cure, but rather because I became caught up in other projects. The only really stinky part was the wax. I finished painting the second coat in the evening, and once it was dry (about an hour or so) I put on the coat of wax before bed. Not my best decision! Oh well, learned my lesson and applied the second coat during they day.


I like how it turned out. The color is great and the finish is butter smooth. Just need to work on the chair now!
:)
Sunday, November 25, 2012
Kitchen "In Progress"
This past Thursday was Thanksgiving, and I was lucky enough to have my husband in town for the holiday. After realizing that we did not need a full turkey, we decided to change the meat. Then, one thing led to another, and we ultimately decided on an Italian theme: of Sausage and White Bean Soup, Chicken Saltimbocca, Garlic Green Beans, Italian spiced Spaghetti Squash, and Lemon Thyme Roasted Mushroom. We went down to the Plaza for the lighting ceremony, and then came back to the house to have tiramisu for dessert. It was a great meal!


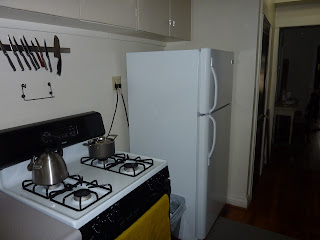


Cooking itself was a bit of a challenge in my tiny kitchen. Strangely, it made me feel quite excited, as though I was cooking in the Smitten Kitchen. As an aside, I LOVE that website. Nick and I have both been following it for years, and the new cookbook is fantastic! As we dodged each other and struggled to get all of the dishes done on time, I definitely felt proud that we were able to turn out such a lovely meal.
Anyway, since Nick and I spent the day dancing around in my tiny kitchen, I thought perhaps it is time to share pictures of my kitchen. The kitchen is definitely in its "good enough for now" stage. I still have some things that I'd love to do, but they aren't going to happen immediately. Mostly, there isn't much space, so there isn't much that you can do to it!


The rugs were cut down from a 5'x7' rug that Nick and I purchased for another space and never really liked. The posters are from the Beijing conferences (one is Beijing at 5, and the other Beijing at 15). I used to display them at my office at DePaul, and they work fine to bring some color into the kitchen for now.


I put the knife rack up when I first moved in, and I don't love it. Primarily because I have so few "real" knives here, and the steak knives are just messy. I might change it up with some magnetic spice containers (I think that I would also like to put some on the fridge).
Remaining Projects for the Kitchen:
- Paint rugs
- Fix knife rack
- Perhaps cafe curtains of some type for the windows
- Find a way to get the awful tile applique off the wall!
Monday, November 12, 2012
Happy Veterans' Day. Observed.
Yesterday was Veterans' Day, but today is the day the government and banks are closed in observance. So while I should have thanked all of those who have served our country yesterday, I am just now getting to it today. Thank you.
The rest of you can be jealous of my no work status now, but the tables will be turned on Black Friday when the rest of the world is lined up outside a Walmart somewhere and I am at work. :-)
The rest of you can be jealous of my no work status now, but the tables will be turned on Black Friday when the rest of the world is lined up outside a Walmart somewhere and I am at work. :-)
I have not been on top of getting posts out for the last few weeks, but that is primarily because I STILL do not have Internet and typing everything out on my phone is killing me. Never fear, I have projects lined up and posts to write.
What am I talking about? Even my husband does not know that I have a blog. ;-) No one is missing these posts!
AT&T is supposed to come today at 2, so with any luck I will be connected hence forth with. I am pretty sure that is not a real phrase. Oh well, sounds cool. Catch you later! I'm off to run errands.
Friday, November 2, 2012
Sometimes the little things can have a big impact!
I was wandering around in the Plaza a while back and decided to stop into Urban Outfitters. Now, I've never owned any clothes from there, but I like the vibe and I knew that they have some home good items, like Anthropologie (sp?) across the street. So I decided to take a gander. The selection of home items was not as good as some other stores that I've been too, but in the knobs bins, I saw these babies.


They have the texture of a wicker, but are in a nice antiqued brass. Best part? They were marked down from $8 to $1.99. Sweet!

I knew just where they could live. You see, I have these built-in bookcases with doors under the windows in the dining room. They came with white ceramic knobs. Nothing bad, but no style. Especially given all the random vintage features in this apartment.

I didn't plan to replace them, but for $2 each (I needed four) it seemed silly not too! I admit, they make me happy when I look at them.


Note to self: no more evening pictures! Everything is either really yellow or bleached out from the flash. Too back I already have a slew of evening photos on the camera waiting for their posts!
Wednesday, October 31, 2012
DIY Roman Shades from Mini Blinds
My apartment is full of mini blinds. See Exh. 1.
I'm not exactly surprised, mini blinds make the apartment world go 'round. But, I'm on the third floor, don't have anyone who can see into my apartment, and mini blinds aren't my favorite thing. Not to mention, the blinds are white and the walls and trim are cream. So, curtains and other window decor it is. Turns out, that is easier said than done.
First, my lease kind of says that I shouldn't be putting things into the wall. I follow those directions. Well, maybe it would be better to say that there will be no evidence of things pounded or screwed into the walls when I leave.
But there is also the issue of nothing being even, level, or symmetrical in this apartment. Really, I'll do a post on it at some point. And the even freakier issue is that my incredibly thick plaster walls make it impossible to put curtain rods up in a way that any normal person would appreciate.
So, what's a girl to do? Hit the internet of course. Apartment Therapy (a great site for browsing and having fun) had a post for no sew roman shades from mini blinds. I was saved! Until I realized that this involved buying mini blinds, because you ultimately destroy them. That was not in the plan. So I hit the interwebs again. And again. No luck. There are a TON of tutorials out there, but they all involve taking the blinds completely apart. Call me cheap, but I did not want to be replacing these blinds when I moved out.
I started to think. The blinds just pull the fabric up, right? So if the full mini blind is still behind the fabric, is that the end of the world? I realized that unless full blackout fabric was used, you would likely still see the outline of the blinds behind the curtain, but I decided I would be okay with that. Anything has to be better than what I have now, right?
And so I began to brainstorm other ways to attach the fabric to the blinds so that I could remove it when I leave. Even if I kept the blinds behind the fabric, gluing fabric to the slats would ruin them. I think that my landlord would notice if the blinds were missing a bunch of slats, or if they looked like glued up caca at the end of my lease. The internet did not appear to agree that there must be another way to adhere the fabric. Heck, they did not even agree with leaving the blinds up! But I thought it was worth a shot. This, of course, would be a much bigger project. I considered using starch (the method for using fabric as removable wallpaper) but was concerned about the longevity with moving the blinds up and down. Sewing was a feasible option. I would have to make the shades, lay them out with the blinds, and hand stitch the fabric around the slats in order to make the shade. But, I could just cut it off when I was done.
As I sat at the dining table thinking this over, I noticed something.
See that? Waaaaaay at the bottom? Those are extra mini blind slats. You see, if you want a custom fit mini blind, you not only trim the sides, but you take out the extra slats. My landlord, like most everyone in the world, never did that. Hmmmm....so I could take out those slats and ultimately use them to replace the ones that I caca-ed up. Small slits at the back of the blind slats, but he'd NEVER notice those. And heck, it is a help to remove those slats because the blinds will look better without them!
And then I realized that I could take out the extra slats, put notches in the back, reinsert them on top of the existing slats, and glue those. That way, when I was done there wouldn't be ANY evidence! Are you following me? Probably not, I'm barely following this myself. And I took very few pictures. Wah wah.
I decided to start in the bedroom because I had some cheap Ikea curtains that I could use for fabric . I could cut the amount that I needed off the bottom or the side for a test window and if it did not work out I would still have enough curtain left to be usable elsewhere after some quick hemming. Plus, the width (57") of those curtains was the exact length of the interior window, making this appear to be a snap. All that I would need to do was cut the curtains to width and use hem tape to finish the edges. Side note, sewing these edges would have been just as easy, but I did not feel like pulling out my machine.)
Basically, I reviewed this tutorial at 365 Day to Simplicity to get a strategy, although I looked at almost every blog post on the internet. I removed all of the extra slats and made the blinds the correct height.

Then, I selected the slats that I was going to use to attach my fabric, and I cut slits in them so that I could reinsert them on top of the existing blinds.

Clearly, I also cut and hemmed my fabric. I'll let you guys look at another tutorial to figure that out. Once I had my fabric, I took one slat and glue it at the top. I left about 1.5" unglued at either side. Once it was all dry, I slipped this slat over the top of the mini blinds, behind the plastic tabs that hold them in. It was important to leave this section unglued so that I could use the tabs to hold in the blind, but have the fabric cover them completely.

This "hung" my fabric. I decided that instead of glue, I would use the glue dots that I happened to have laying around. From my wedding invites. Five plus years ago. For realz.

This ended up being great, because they had enough strength to attach the fabric, but they were not messy or wet and I was able to reposition as needed. I ended up gluing the fabric to the blind on every fourteenth slat. I initially inserted the dummy slats every seventh row, but I didn't like how narrow the folds were, so I removed half of the slats and pulled it up again. Much better!
I also used the swivel rod as a weight on the bottom to make the first fold hang very neatly. It didn't fit on the blinds anymore anyway, and this way I don't have to worry about losing them. So, here they are!!


 |
| Exhibit 1: Bedroom Blinds |
First, my lease kind of says that I shouldn't be putting things into the wall. I follow those directions. Well, maybe it would be better to say that there will be no evidence of things pounded or screwed into the walls when I leave.
But there is also the issue of nothing being even, level, or symmetrical in this apartment. Really, I'll do a post on it at some point. And the even freakier issue is that my incredibly thick plaster walls make it impossible to put curtain rods up in a way that any normal person would appreciate.
So, what's a girl to do? Hit the internet of course. Apartment Therapy (a great site for browsing and having fun) had a post for no sew roman shades from mini blinds. I was saved! Until I realized that this involved buying mini blinds, because you ultimately destroy them. That was not in the plan. So I hit the interwebs again. And again. No luck. There are a TON of tutorials out there, but they all involve taking the blinds completely apart. Call me cheap, but I did not want to be replacing these blinds when I moved out.
I started to think. The blinds just pull the fabric up, right? So if the full mini blind is still behind the fabric, is that the end of the world? I realized that unless full blackout fabric was used, you would likely still see the outline of the blinds behind the curtain, but I decided I would be okay with that. Anything has to be better than what I have now, right?
And so I began to brainstorm other ways to attach the fabric to the blinds so that I could remove it when I leave. Even if I kept the blinds behind the fabric, gluing fabric to the slats would ruin them. I think that my landlord would notice if the blinds were missing a bunch of slats, or if they looked like glued up caca at the end of my lease. The internet did not appear to agree that there must be another way to adhere the fabric. Heck, they did not even agree with leaving the blinds up! But I thought it was worth a shot. This, of course, would be a much bigger project. I considered using starch (the method for using fabric as removable wallpaper) but was concerned about the longevity with moving the blinds up and down. Sewing was a feasible option. I would have to make the shades, lay them out with the blinds, and hand stitch the fabric around the slats in order to make the shade. But, I could just cut it off when I was done.
As I sat at the dining table thinking this over, I noticed something.
 |
| Okay, so these are the blinds in my living room. I already removed half the slats in my whole house, so I can't show you the ones from the dining room. But those were even thicker. |
See that? Waaaaaay at the bottom? Those are extra mini blind slats. You see, if you want a custom fit mini blind, you not only trim the sides, but you take out the extra slats. My landlord, like most everyone in the world, never did that. Hmmmm....so I could take out those slats and ultimately use them to replace the ones that I caca-ed up. Small slits at the back of the blind slats, but he'd NEVER notice those. And heck, it is a help to remove those slats because the blinds will look better without them!
I decided to start in the bedroom because I had some cheap Ikea curtains that I could use for fabric . I could cut the amount that I needed off the bottom or the side for a test window and if it did not work out I would still have enough curtain left to be usable elsewhere after some quick hemming. Plus, the width (57") of those curtains was the exact length of the interior window, making this appear to be a snap. All that I would need to do was cut the curtains to width and use hem tape to finish the edges. Side note, sewing these edges would have been just as easy, but I did not feel like pulling out my machine.)
Basically, I reviewed this tutorial at 365 Day to Simplicity to get a strategy, although I looked at almost every blog post on the internet. I removed all of the extra slats and made the blinds the correct height.

Then, I selected the slats that I was going to use to attach my fabric, and I cut slits in them so that I could reinsert them on top of the existing blinds.

Clearly, I also cut and hemmed my fabric. I'll let you guys look at another tutorial to figure that out. Once I had my fabric, I took one slat and glue it at the top. I left about 1.5" unglued at either side. Once it was all dry, I slipped this slat over the top of the mini blinds, behind the plastic tabs that hold them in. It was important to leave this section unglued so that I could use the tabs to hold in the blind, but have the fabric cover them completely.

This "hung" my fabric. I decided that instead of glue, I would use the glue dots that I happened to have laying around. From my wedding invites. Five plus years ago. For realz.

This ended up being great, because they had enough strength to attach the fabric, but they were not messy or wet and I was able to reposition as needed. I ended up gluing the fabric to the blind on every fourteenth slat. I initially inserted the dummy slats every seventh row, but I didn't like how narrow the folds were, so I removed half of the slats and pulled it up again. Much better!
I also used the swivel rod as a weight on the bottom to make the first fold hang very neatly. It didn't fit on the blinds anymore anyway, and this way I don't have to worry about losing them. So, here they are!!

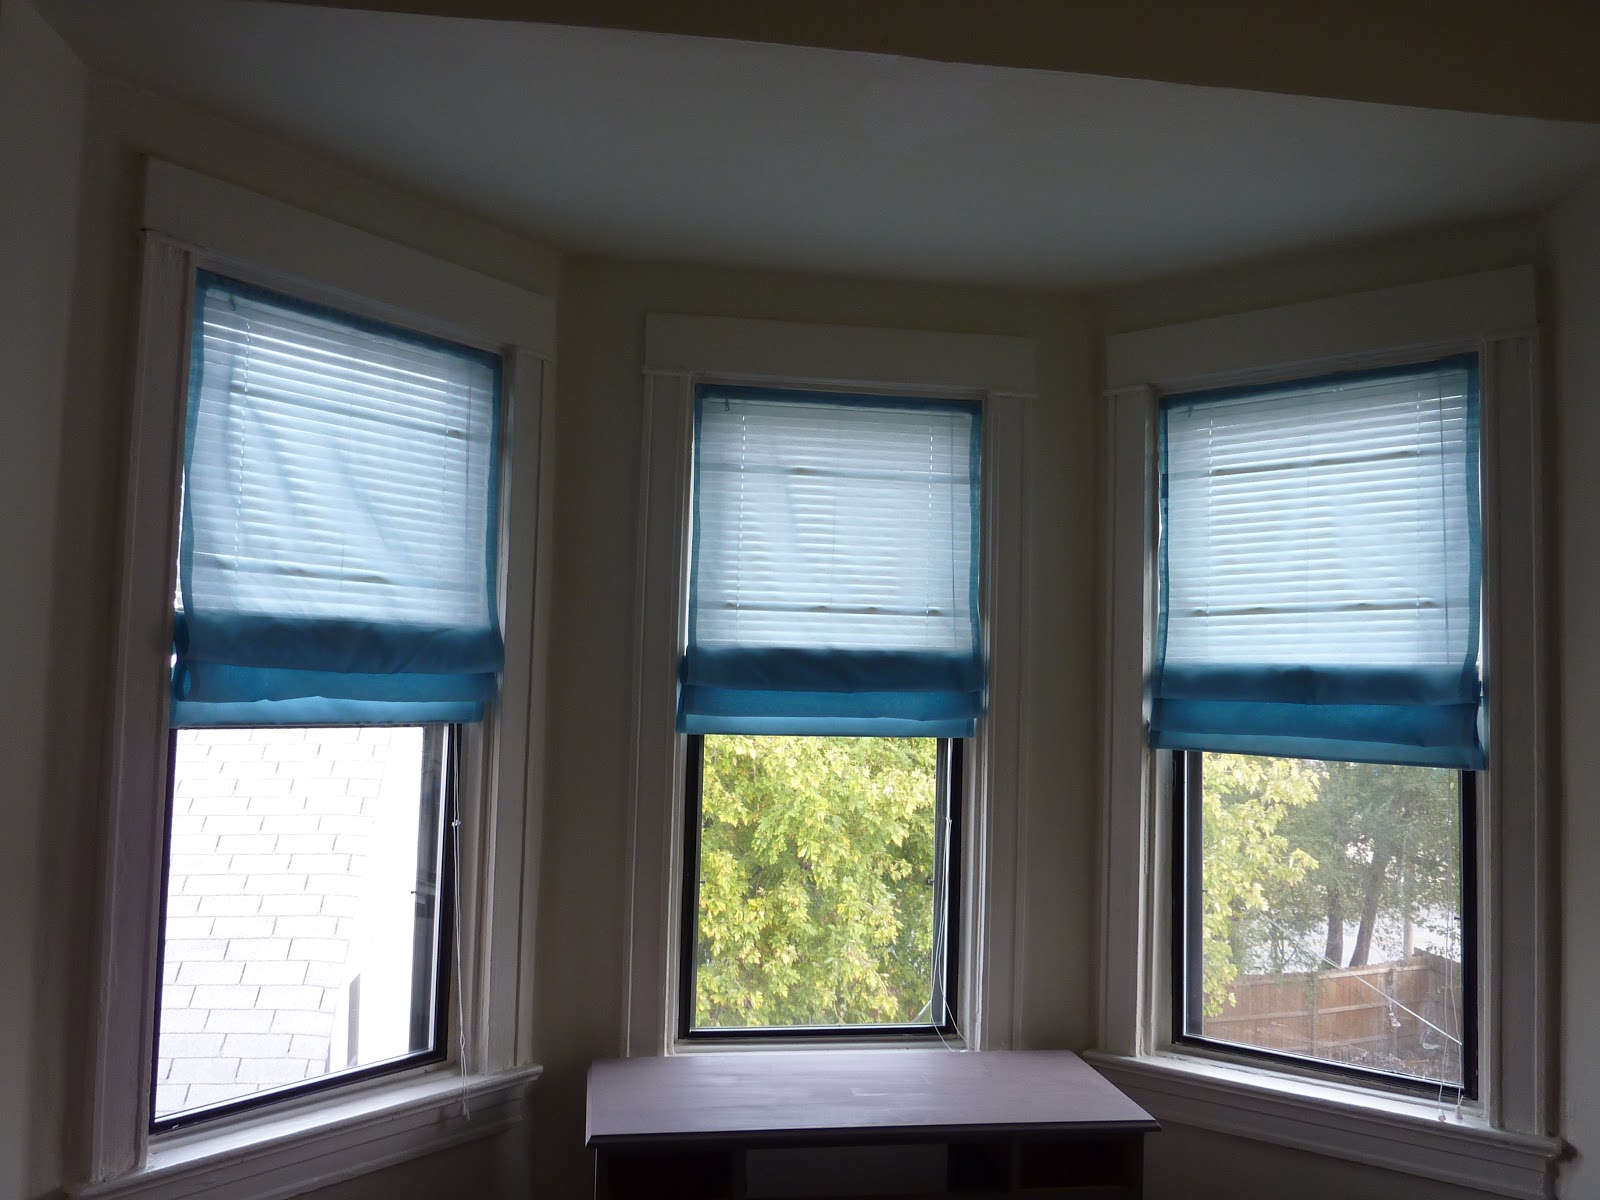
During the day the slats are more obvious, because the sunlight is behind them. At night you cannot see them as easily, but they are still visible. This is largely because I used a very sheer fabric. A heavier fabric would not have been so obvious.
Either way, I feel like I cracked the Davinci code. How to make easy roman shades that are apartment friendly!
Next up, my even more apartment friendly relaxed roman shades in the dining room! I am really excited about this new idea, just need to get on it already!
Either way, I feel like I cracked the Davinci code. How to make easy roman shades that are apartment friendly!
Next up, my even more apartment friendly relaxed roman shades in the dining room! I am really excited about this new idea, just need to get on it already!
Monday, October 29, 2012
My Bee-U-tiful Green Buffet
A while back I mentioned some of my CL finds that we bought in Chicago in order to take to KCMO. Best decision ever by the way, I still have zero idea where folks buy stuff here!


Anyway, one of those finds was this beauty. Or not beauty.


I mentioned at the time that I had plans to fix her up so that she was less poo brown hideous. And she was hideous. As in, I felt the need to explain to the movers that the buffet came that way and I was not responsible for her current state, hideous.
My initial plan was to strip the buffet down to the original wood, and then either seal it, stain it, or maybe treat it with a color wash. So, I got to it with my handy stripper, scraper, and mineral salts. At first, it seemed to be going well. I was stripping in bursts around work (so evenings and one weekend), so it was not fast, but there was progress.


Then I realized that in certain areas the paint was just NOT coming off the way that it should be. The one thing that the previous owners did that even smacked of being correct was use a primer. And it was not clearing on some of the smaller sections. It is also possible that my stripper was losing its effectiveness.

It was at this point that I realized I was going to have to paint the sucker. Which is NOT what I originally wanted to do. Thankfully, I had already been planning to paint some of the other furniture in the dining room using DIY chalk paint. For those of you who are not familiar, chalk point is all.the.rage. on the home decor blogging scene. There is the awesome stuff called Annie Sloane Chalk Paint or ASCP for short that leaves a wonderful matte finish that is described as being really unique and just fantastic for furniture. Other bonuses are that it dries quickly, covers without primer and is really workable. So, I decided that this buffet would also receive that finish. But, because this paint is not readily available in stores, I also decided to follow one of the 6,000,000 tutorials on line and make my own. This had the added benefit of allowing me to use any color I wanted and of being cheap. The quality is described as not *quite* the same, but how is anyone who ever visits my house going to know that?
The bummer at this point was that I had already started stripping. If I had known from the beginning that I was using chalk paint, I never would have begun the process. But now that I had some pieces very light and others still poo brown, I could see that the paint would ultimately look as though it was two different color shades because of the different bases. So I continued to strip, but really only worried about getting the worst of the brown off and did not focus on getting all of the primer or original brown off.
Then, I painted. I ended up using an oops paint color that I found at Home Depot. It was an olive green, and I added some white that I had to lighten it up, and then added the plaster of paris. The color turned out very nicely, if I do say so myself. Especially since I made a few batches of this stuff freehand,and it still matches.
This sucker was a BEAST to paint. All the damn slats made me want to slit my throat. I also painted it disassembled, and then assembled it again. Going back, I would have painted the top separate but assembled the rest before I painted it. Oh well. Then it was a few layers of wax (which I think I did right!) and it was done. I almost peed my pants I was so excited.

It's not perfect, but it's not poo colored, and so I'll take it! Here's are some slightly more updated photos.


Clearly the way that it is decorated still leaves something to be desired!
Subscribe to:
Posts (Atom)